Vehicle Armoring Process
In a typical armored vehicle the entire passenger compartment is enclosed in lightweight composite armors that are impervious to all handgun and submachine gun munitions. Two types of armor are used in the armoring process, transparent and opaque.
Transparent armor is used for the windows and consists of dense layered ballistic glass that is laminated to a tough inner spall shield of resilient polycarbonate. Opaque armor consists of lightweight composite armor (Spectra Shield), high-hardened ballistic steel, and other specialized ballistic materials.
Once the vehicle has been armored, it’s reassembled to mirror the original factory finish.
Click on the steps below to learn more about the process:
Step 1 | Step 2 | Step 3 | Step 4 | Step 5 | Step 6 | Final Step
Once the client’s vehicle and deposit have been received, a work order is put into effect describing the materials and levels of protection that the owner of the vehicle has requested. It is at this point that the armoring process can begin.
Texas Armoring Corporation begins the process of armoring one of our vehicles by covering the entire surface of the car with specialized 3M™ protective tape.
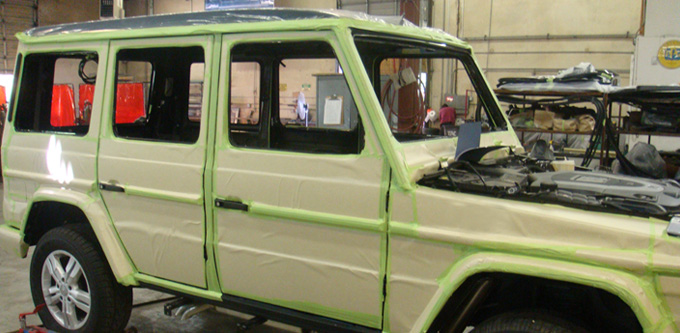
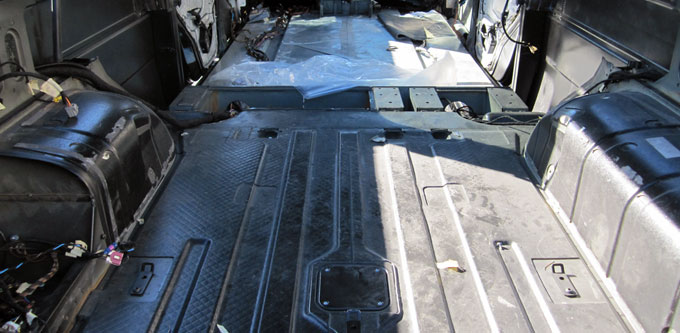
We then completely dismantle the interior of the vehicle, exposing only its frame. All the interior parts of the vehicle are removed and assigned a number corresponding to the vehicle so that nothing will be misplaced.
The process is continued by measuring the floor, ceiling, doors, and firewall, which enables us to cut and construct the pieces of ballistic material necessary to cover each of these areas. These materials stop any kind of metal fragments from penetrating the passenger compartment.
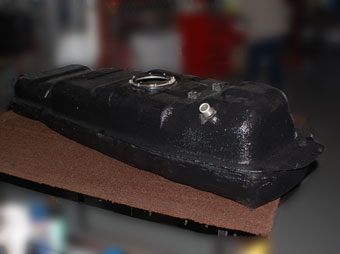
It is at this time that we also remove the fuel tank to protect it with ballistic nylon and cover it with a water-resistant coating. TAC then assesses the suspension and braking systems of the vehicle and modifies them to support the added weight caused by the armor.
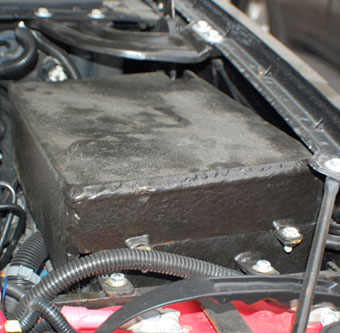
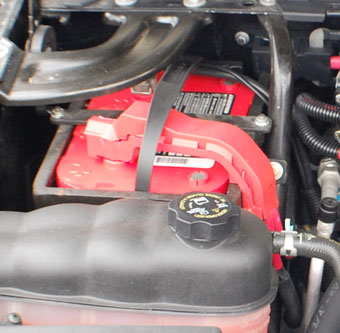
We follow by covering the battery, fuse box, and ECM with protective ballistic steel.
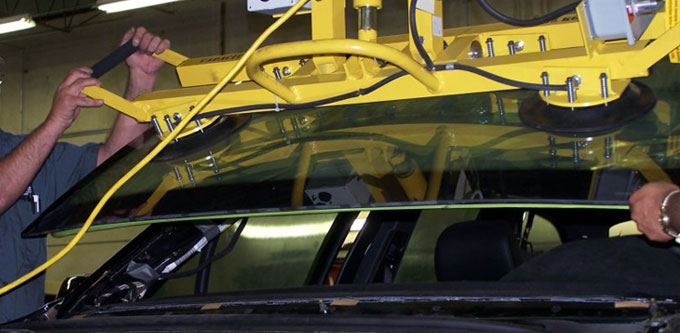
Next, we install the nearly 2″ thick bullet-proof glass windows. These are made to fit OEM window channels, giving them a perfect factory finish.
Finally, the vehicle is outfitted with high-performance run-flat-tire inserts. Additional options, including defensive capabilities, are worked in throughout the entire process.

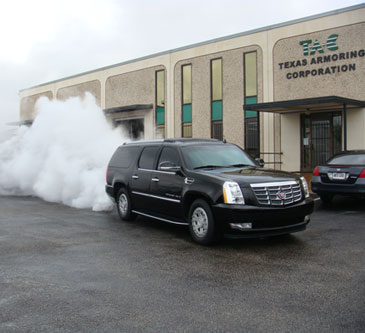
TAC then replaces the interior of the vehicle just as it was received. Our technicians pay special attention to conserve the luxury and beauty of the vehicle while finalizing every detail. Now the vehicle is fully armored, yet maintains its factory appearance. Once the account balance has been received, the vehicle is delivered to its final destination.


